¶ A. Overview & Brief Instructions
This guide will walk you through the process of spinning up one or more Node instances of Foundry on a macOS host. It assumes you're running macOS 15 (Sequoia), but everything should still work under other recent versions, just some small UI details may be different.
If you really know what you're doing, you can skip to the TL;DR list of brief steps at the very end.
If you need help with any of this, head over to the #install-and-connection channel on the Foundry Discord server.
¶ B. Folder Setup
For each of the terminal commands in this guide, copy the whole line, paste it into the Terminal app at the prompt, and then hit Return or Enter.
B1: First, locate and open the Terminal app. You can find it inside the Applications/Utilities folder, or by searching for it (⌘-Space). We'll be doing almost everything inside the Terminal app.
Copy, paste, and run this command in Terminal:
mkdir -p ~/Applications/Foundry/userdata
If you decide to spin up more than one Foundry instance in this way, you'll want to modify these folder names so that it is clear which is which. For example, you may want to use
/Foundry12/userdatato indicate that this is a Foundry v12 instance. If you're doing this, you'll just need to watch for other times in the guide where these folder names are used, and tweak them as needed. See Section I for more details.
This will create a few new folders inside your home directory, where we are going to store both the application and the userdata for this new Node instance.
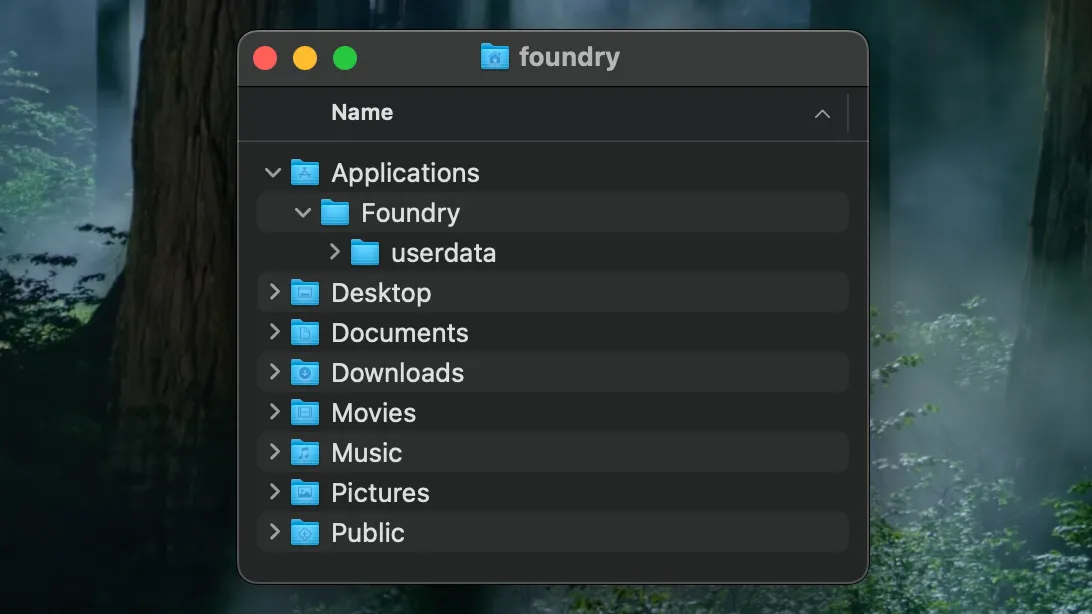
B2: Let's verify that the folders were created, and open them up for the next steps.
In the Finder, open your home directory (⌘-Shift-H, or use the Go menu > Home).
Open the Applications folder, then you should be able to see and open the Foundry folder.
The
Applicationsfolder inside your home directory is where it's best to store your own personal apps (as opposed to the "main" Applications folder at the root of your drive).
You should now be seeing something like this:
¶ C. Download Foundry
C1: Go to your Purchased Licenses page on the Foundry website (you'll need to be logged in). Choose the version of the app you want, and then choose Node.js in the Operating System dropdown. (We're not downloading a Mac app here, we're getting the Node version.)
If you're installing a v12 or earlier host, choose Linux in this dropdown, as those earlier versions were packaged alongside a desktop Linux app.
Click the Download button. When it's complete, find the zip file that was downloaded, and double-click it to unzip it. You will now have a folder named something like FoundryVTT-12.331. You can delete the zip file.
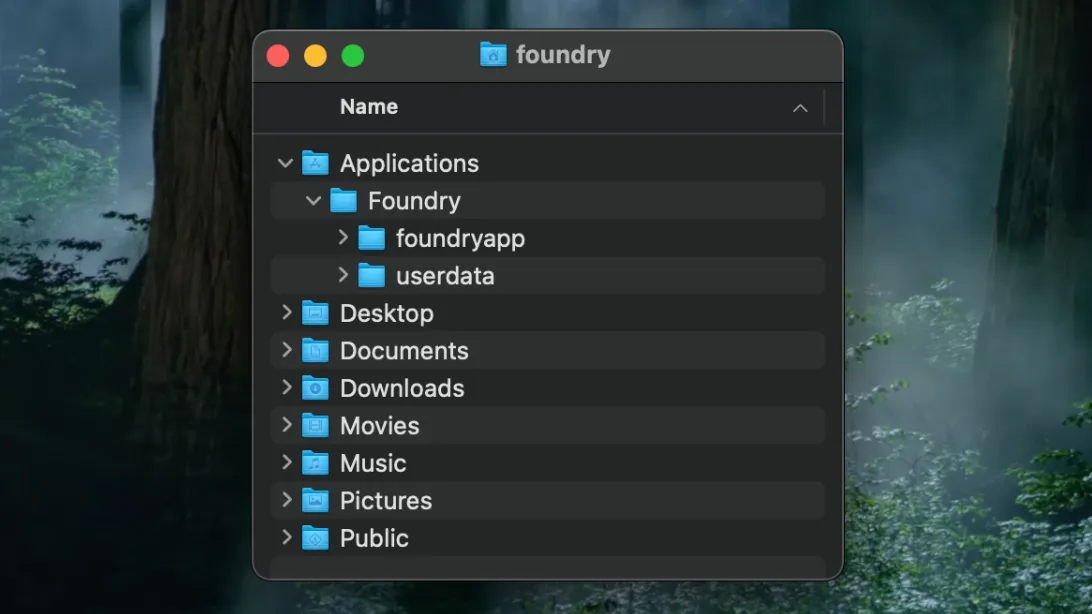
C2: Move this new folder into the Foundry folder we created earlier, which should still be open.
C3: Rename this folder to foundryapp, so that we can refer to it more easily from now on.
You should now have a foundryapp folder and a userdata folder, inside the Foundry folder, like this:
¶ D. Install Homebrew
D1: Since macOS doesn't ship with Node, we need to install it. The simplest way to do that is via the Homebrew package manager, which we'll download and install with this command:
sudo curl -o- https://raw.githubusercontent.com/Homebrew/install/HEAD/install.sh | bash
This command needs to be run with
sudo— elevated permissions — so you'll be prompted to enter your Mac user's password here.
This will take a minute or two to complete, with lots of activity scrolling by in Terminal.
D2: When that is complete, you will see a Next steps: line, and a bunch of commands. Select all three commands, from the first echo to the last ", like so:
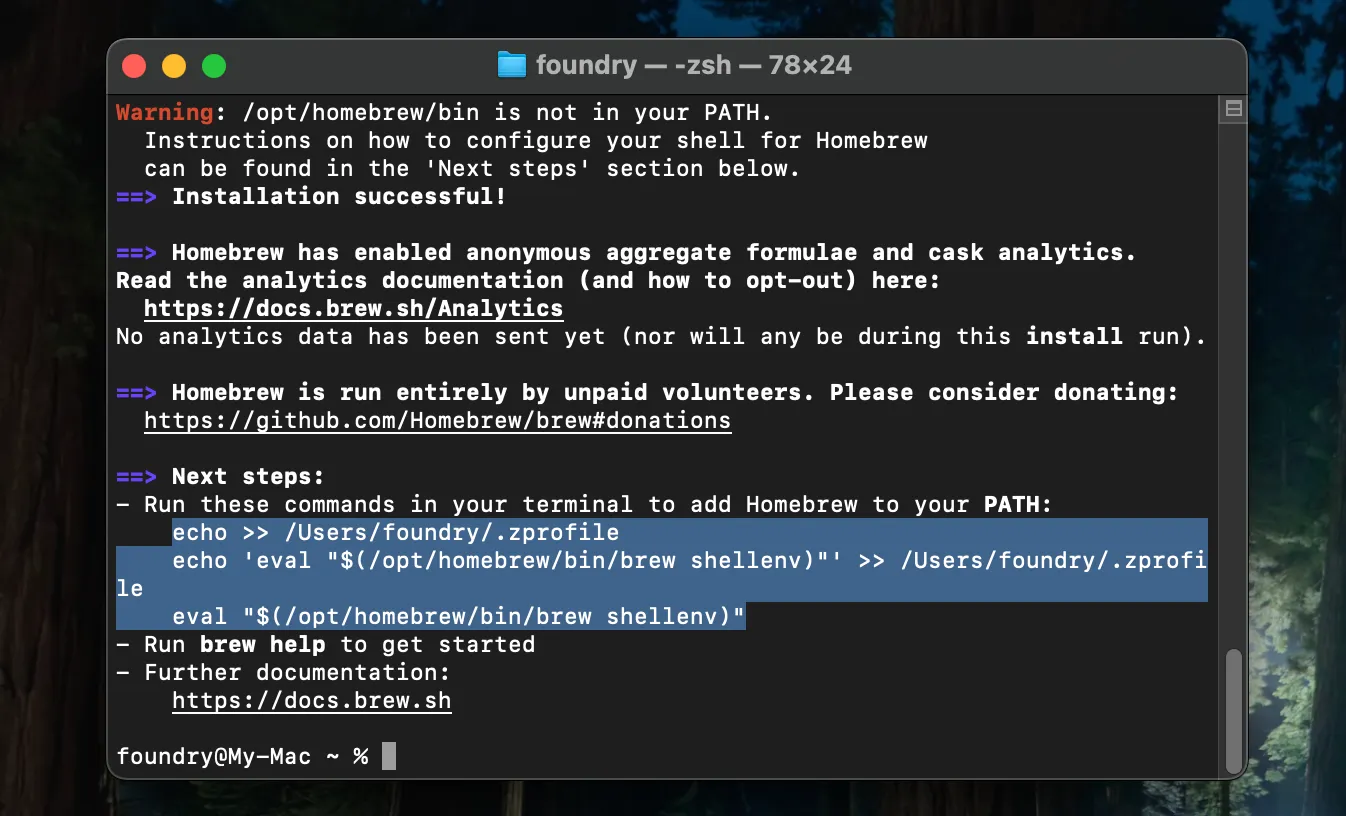
Then copy that text (⌘C), paste it at the Terminal prompt (⌘V), and hit Return/Enter to run all three commands. They should complete immediately.
¶ E. Install Node
E1: Now we can install Node. We'll be using Node 22 here, which will work for Foundry v11, v12, and v13.
If you're installing some other version, check the Release Notes for the first Prototype build of that version to see what Node versions it supports.
Enter this into the terminal:
brew install node@22
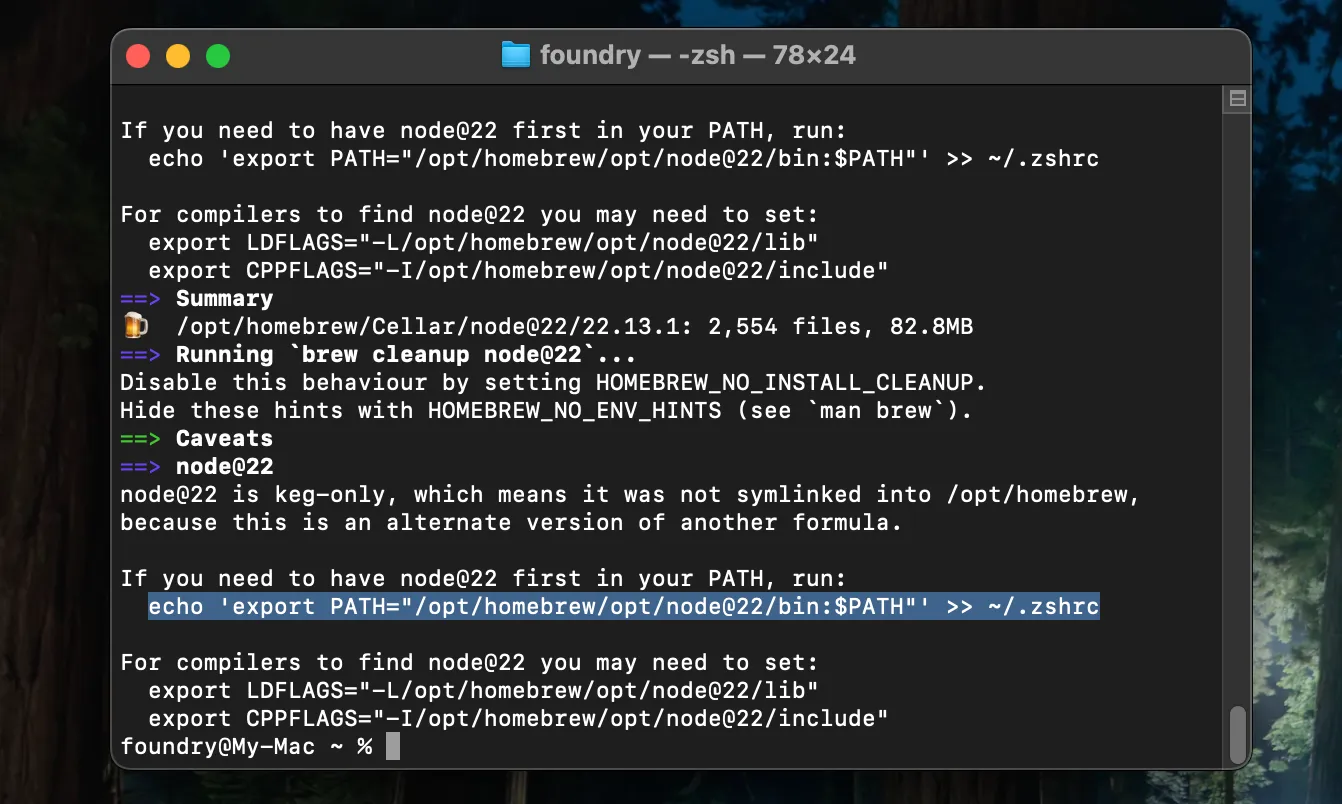
E2: When that install is complete, we will again need to copy/paste a command that is shown at the end. Select the line starting with echo, copy it, paste it at the prompt, hit Return/Enter.
E3: After that, we need to refresh your Terminal session. Close the Terminal window, then go to the Shell menu and choose "New Window" (or hit ⌘N). Or, just quit the Terminal app and launch it again.
¶ F. Install PM2
F1: Now that Node is installed, we can use its npm package manager to install pm2, which will be what we use to start & stop this Foundry instance, and allow it to run in the background.
npm install pm2@latest -g
Ignore the npm notice lines that show when this is complete.
¶ G. Launch Foundry
G1: Now we're ready to launch this Foundry instance. It's important to pause here and consider what your situation is, because we have to choose a port to listen on:
- If you are intending to swap between using your desktop app instance and this Node instance, then they can both use the same port (
30000), and you won't need to worry about your router config. - If you are intending to have this Node instance running in the background, so that it will be accessible simultaneously with your desktop app's instance, then you will need to use a unique port when launching the Node host (
30001for example), and will likely need to set up a second forwarding rule in your router.
Note that in this case a second Foundry license is also required, if others are going to be able to access both hosts at any time.
We'll assume you're going with port 30000; edit the command below with a different port number if you're deciding to change it.
G2a: Launch Foundry v13 or later via pm2:
pm2 start "node ~/Applications/Foundry/foundryapp/main.js --dataPath=$HOME/Applications/Foundry/userdata --port=30000" --name foundry
If you are installing Foundry v12 or earlier, then your
main.jsfile will be in a slightly different location — use the following command instead:
G2b: Launch Foundry v12 or earlier via pm2:
pm2 start "node ~/Applications/Foundry/foundryapp/resources/app/main.js --dataPath=$HOME/Applications/Foundry/userdata --port=30000" --name foundry
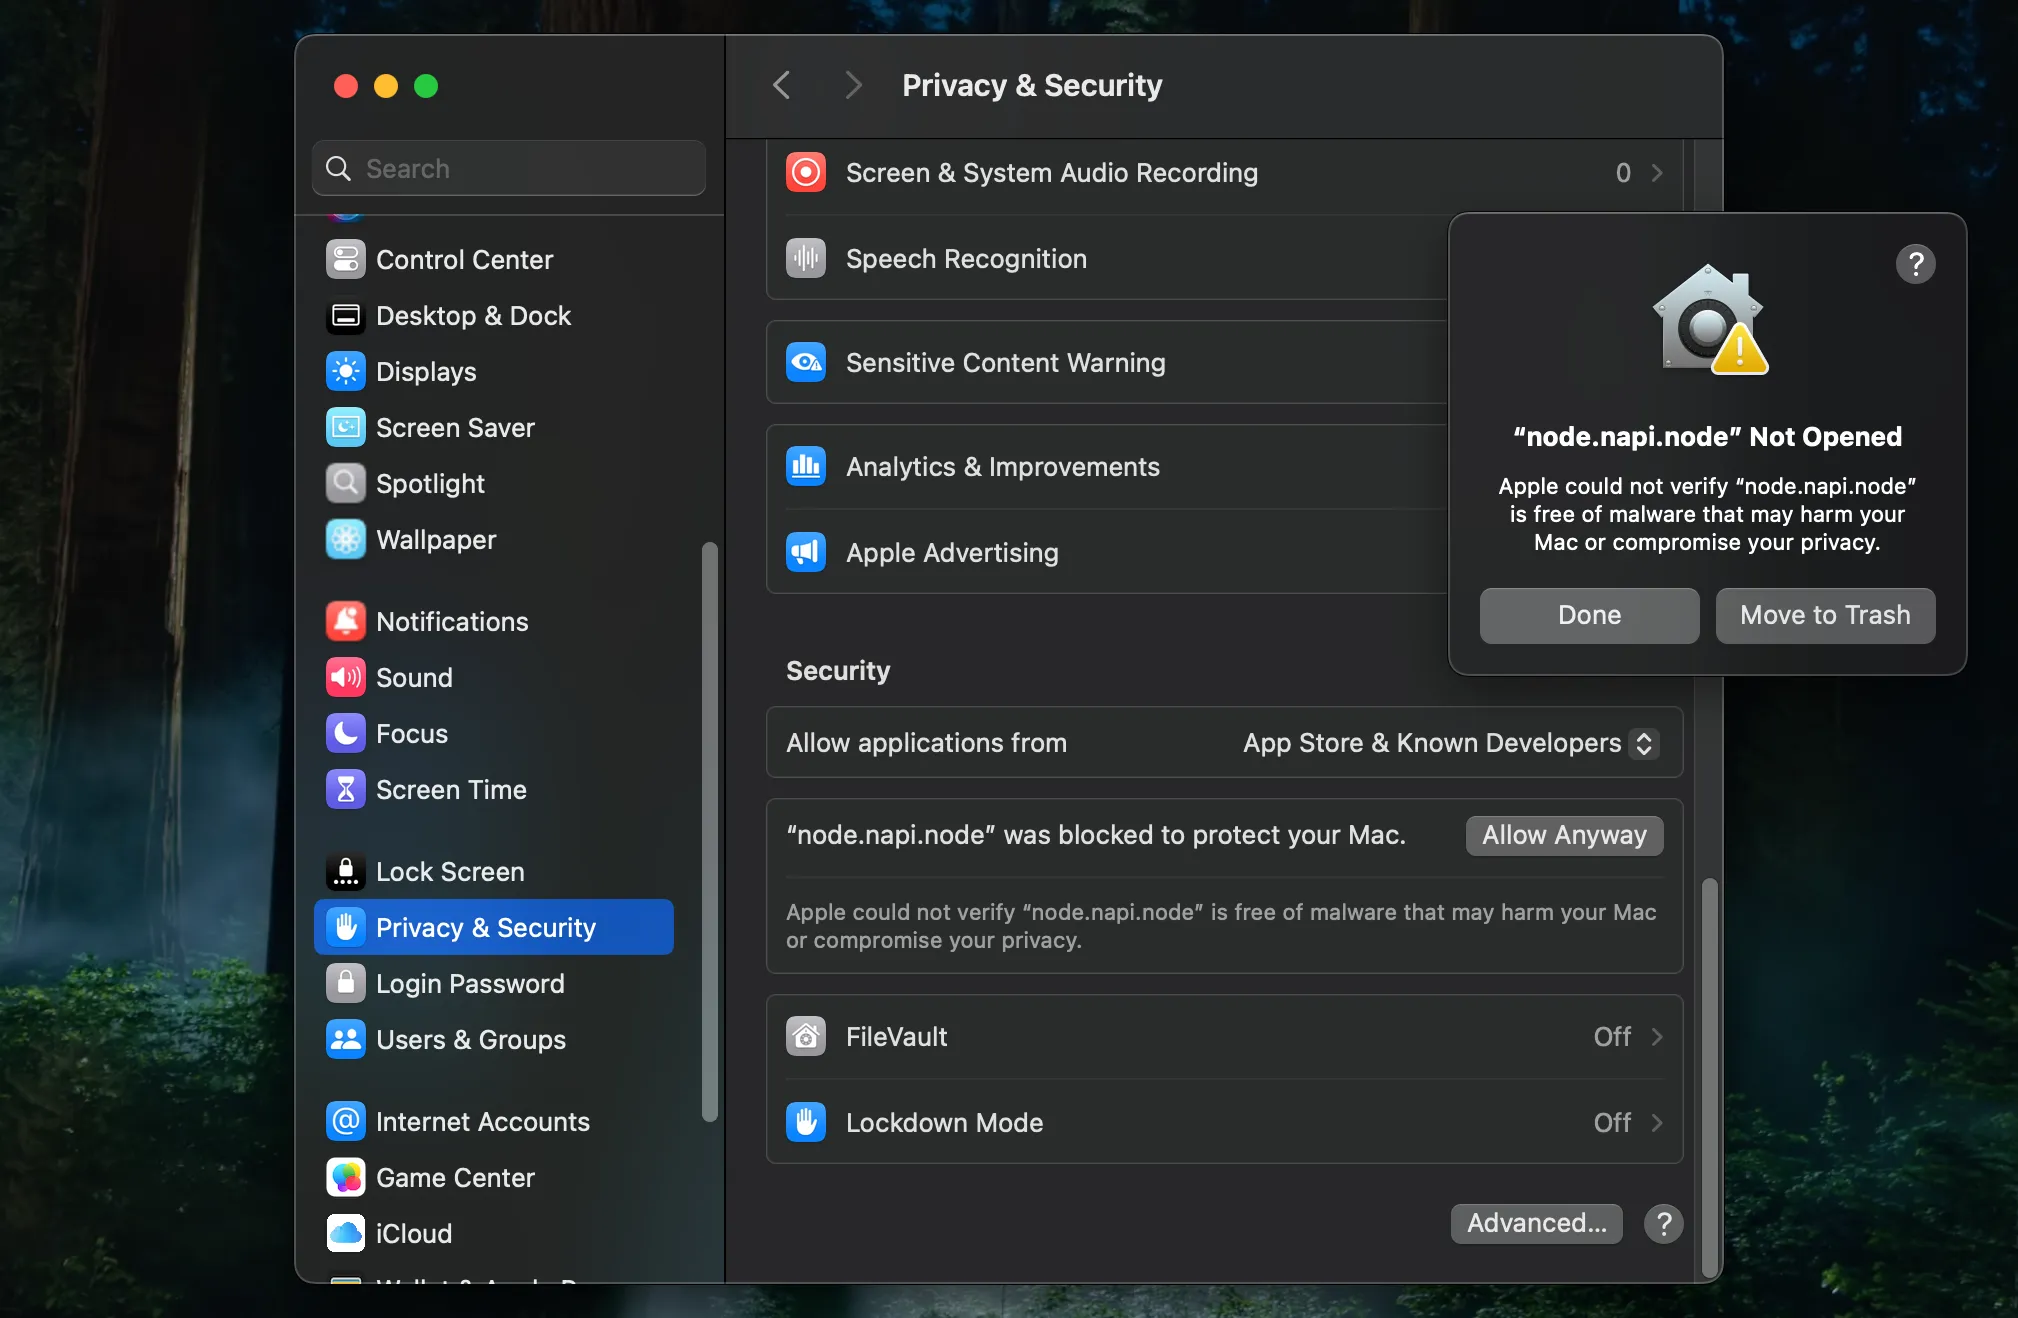
As soon as you run this, macOS should throw a warning that the Node app was "not opened" for security reasons. Don't click anything in this dialog, just ignore it for a moment (you can drag the dialog out of the way).
G3: Open the System Settings app, go to the Privacy & Security section, scroll to the bottom, and click the Allow Anyway button next to the message about the Node app being blocked:
G4: Click the "Done" button in the "Not Opened" dialog. You should get a new dialog, which will now have an "Open Anyway" button. Click that. You will be prompted to enter your macOS user password. You can then close the System Settings app.
G5: Back in Terminal, see if the Node instance is properly running still:
pm2 list
You should see something like this:
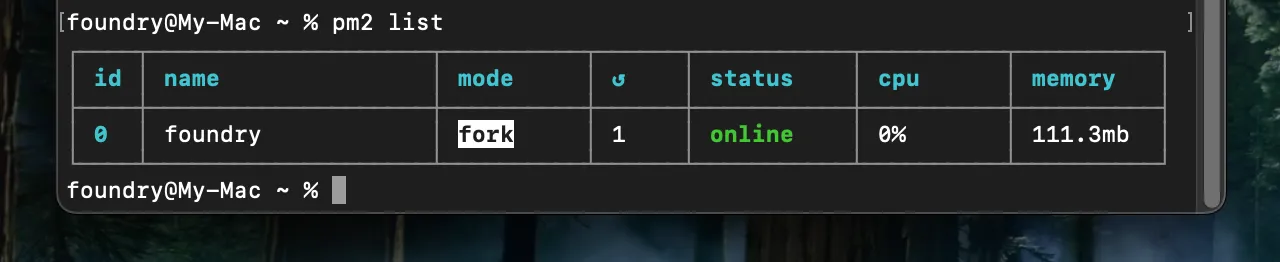
If you see that the Status for the process is
errored, this is likely due to having the Foundry desktop app still running, and using the same port. Either close the desktop app, or choose a unique port for each. Usepm2 restart foundryto retry after sorting this out.
G6: Save the setup of this pm2 process:
pm2 save
G7: Now try connecting to this host. You will use a web browser for this, which must be supported by Foundry (Chrome, Opera, Edge, or Firefox) and up to date. In this browser, go to http://localhost:30000 (change the port number if you've set this up with a different one).
You should be prompted to enter your Foundry license key (which can be the same as the one you used for your desktop app, if you're not going to be having both installations available to others at the same time).
Save a bookmark for this address, and you're now ready to play on this instance.
Note that your userdata folder for this instance is at
~/Applications/Foundry/userdata, in your home directory, which you can access and organize any time.
¶ H. General Use
H1: Now that you've launched this Node instance with pm2, it will remain running until you tell it to stop, including automatically relaunching itself after restarting your computer.
If you need to manually stop it (so that you can run your desktop app instance instead, for example), launch the Terminal app, and do:
pm2 stop foundry
Likewise, you can use pm2 start foundry to start it again, and pm2 restart foundry any time you need to just restart the instance.
¶ I. More Instances
I1: Once you've done all the work to get this far, it's very easy to spin up more Node instances at any time, with the following considerations:
- Each instance always needs its own unique userdata folder.
- A new instance of the same Foundry version as an existing instance doesn't need its own app folder; can re-use the same one.
- You'll want to start being more explicit with your folder and process naming, so that it's always clear what's what.
- Always keep in mind the terms of the Foundry license, with respect to having multiple hosts available to others.
I2: Here's a brief example of how to, say, add a v11 instance to your machine:
- In the
~/Applicationsfolder in your home directory, make aFoundry11folder. - Download Foundry v11.315 from the website, unzip it, move the folder into
Foundry11, and rename the folderfoundryapp. - Make a
userdatafolder here as well, alongsidefoundryapp. - In Terminal, launch a new
pm2process for v11, with:
pm2 start "node ~/Applications/Foundry11/foundryapp/resources/app/main.js --dataPath=$HOME/Applications/Foundry11/userdata --port=30011" --name foundry11
Note the changes there, compared to the initial launch command: The Foundry11 folder in two places, the foundry11 process name at the end, and a unique port.
It's helpful to make your ports easy to remember by tying them to the instance version, so
30011here, and perhaps30013for a v13 instance.
Once that's up, do a pm2 save to save it, and then manage it the same as described earlier, but with its unique process name — pm2 stop foundry11 for example.
Now your v11 instance will be available in your browser at http://localhost:30011
¶ X. TL;DR
X1: If you know what you're doing with the Terminal and file management on macOS, here's a no-guide list of the steps to take:
Please follow the full guide above if you don't already know what every one of these commands does.
mkdir -p ~/Applications/Foundry/userdata
curl -o ~/Applications/Foundry/foundryvtt.zip "Timed URL"
unzip ~Applications/Foundry/foundryvtt.zip -d ~/Applications/Foundry/foundryapp
rm ~/Applications/Foundry/foundryvtt.zip
sudo curl -o- https://raw.githubusercontent.com/Homebrew/install/HEAD/install.sh | bash
brew install node@22
npm install pm2@latest -g
pm2 start "node ~/Applications/Foundry/foundryapp/main.js --dataPath=$HOME/Applications/Foundry/userdata --port=30000" --name foundry
pm2 save