¶ Introduction
Your Synology NAS is a great place to host Foundry VTT. It is also quite easy to setup HTTPS thanks to the great integration of Let's Encrypt, the free certificate provider.
¶ Setting up Foundry VTT on your NAS
¶ Prerequisites
- Have a Foundry VTT license
- Have an up to date Synology NAS
¶ Two ways for setting up Foundry VTT on Synology
- Self-hosting as a base Linux, with some slight changes in the steps. This requires to install NodeJS and run the provided command lines.
- Run a Docker image and set it up to download your licensed version of Foundry VTT. It can run permanently and be toggled on or off in Docker
Both allows to run it permanently. The Docker way involves no command line and can be performed by non too technical people.
¶ Configuring HTTPS (SSL) on your Foundry VTT web site
This assumes your NAS is already visible to the internet. If not, we encourage you to consider this matter first and follow guides on how to “open” the connectivity to your NAS while being protected.
Configuring HTTPS (SSL) for your hosted Foundry VTT is good because:
- The transiting data is secured and your are less subject to attacks
- You can then easily activate Audio/Video integration which relies on a secured communication
¶ Prerequisites for setting up HTTPS
- NAS is already visible from the internet on port 443 (port fowarding is configured for HTTPS)
- Have a domain name for your Foundry VTT
- If you're in a hurry the longest step is by far waiting for the public DNS servers to propagate your domain entry that points to your NAS. Consider doing this first.
¶ Setting up the Linux way
This is close to the official guide for running on Linux. Some things such as directory locations can be adjusted based on your own setup.
¶ Basic Setup
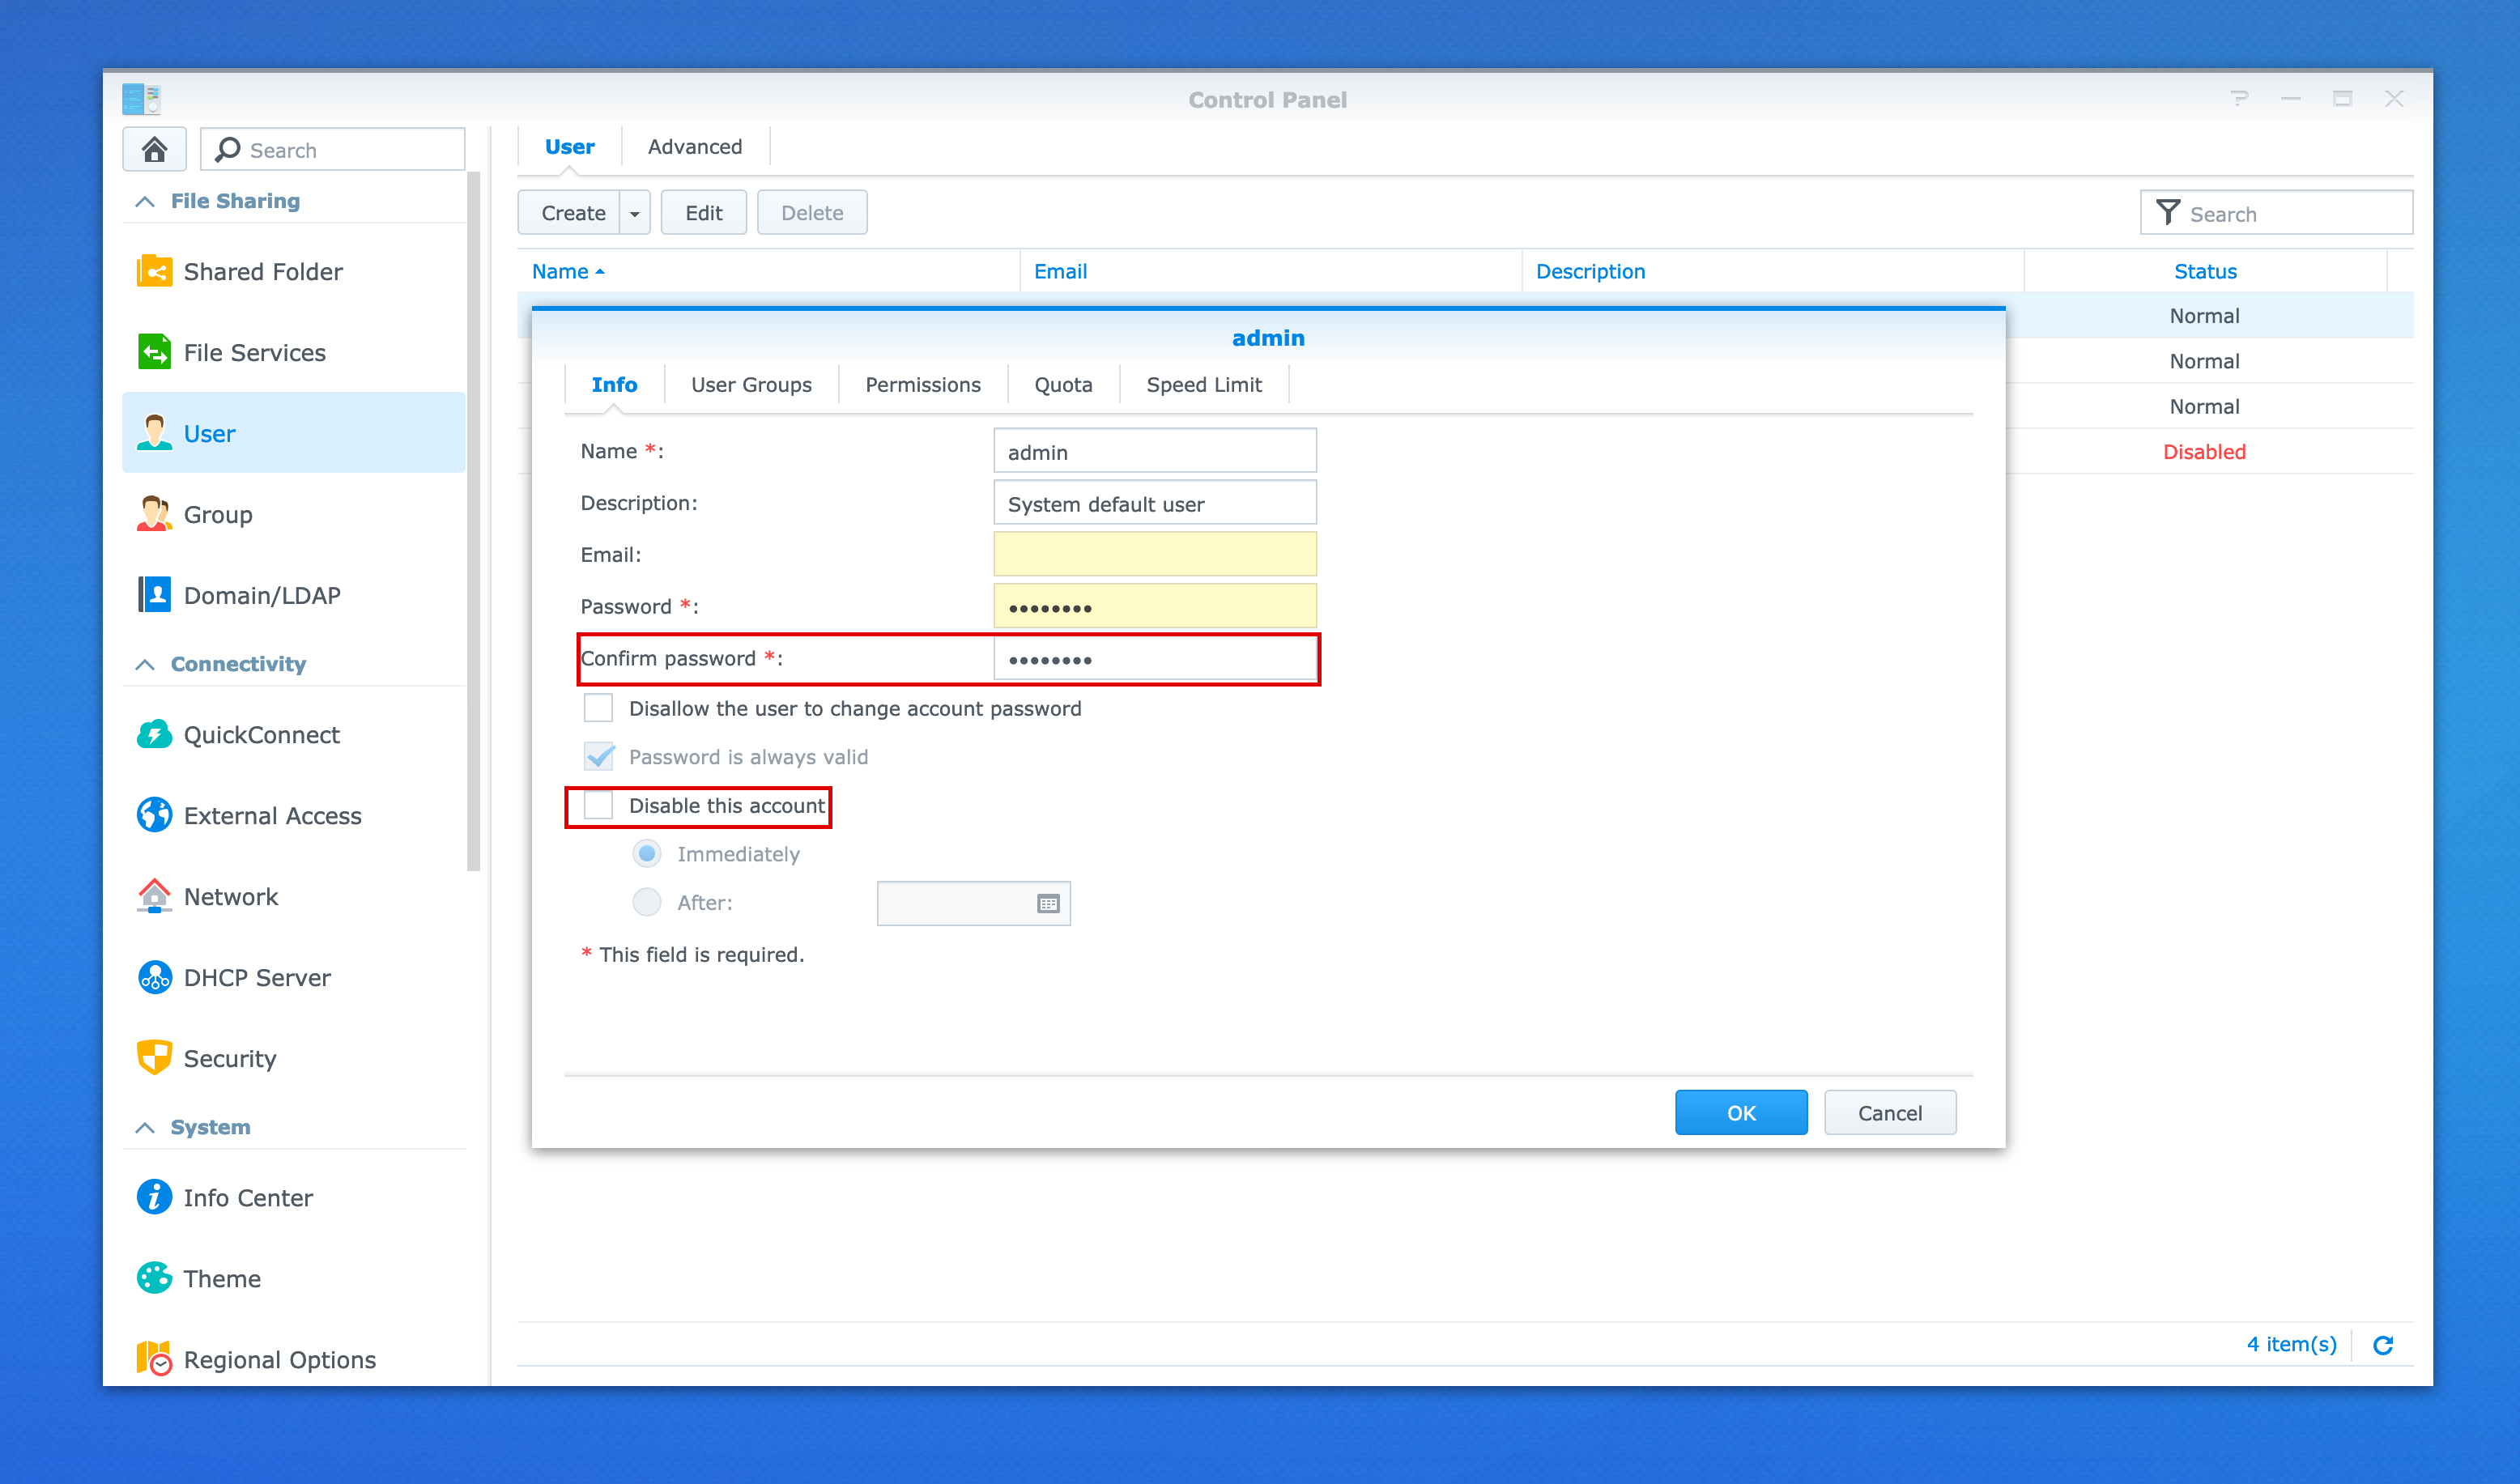
- Enable admin user in DSM
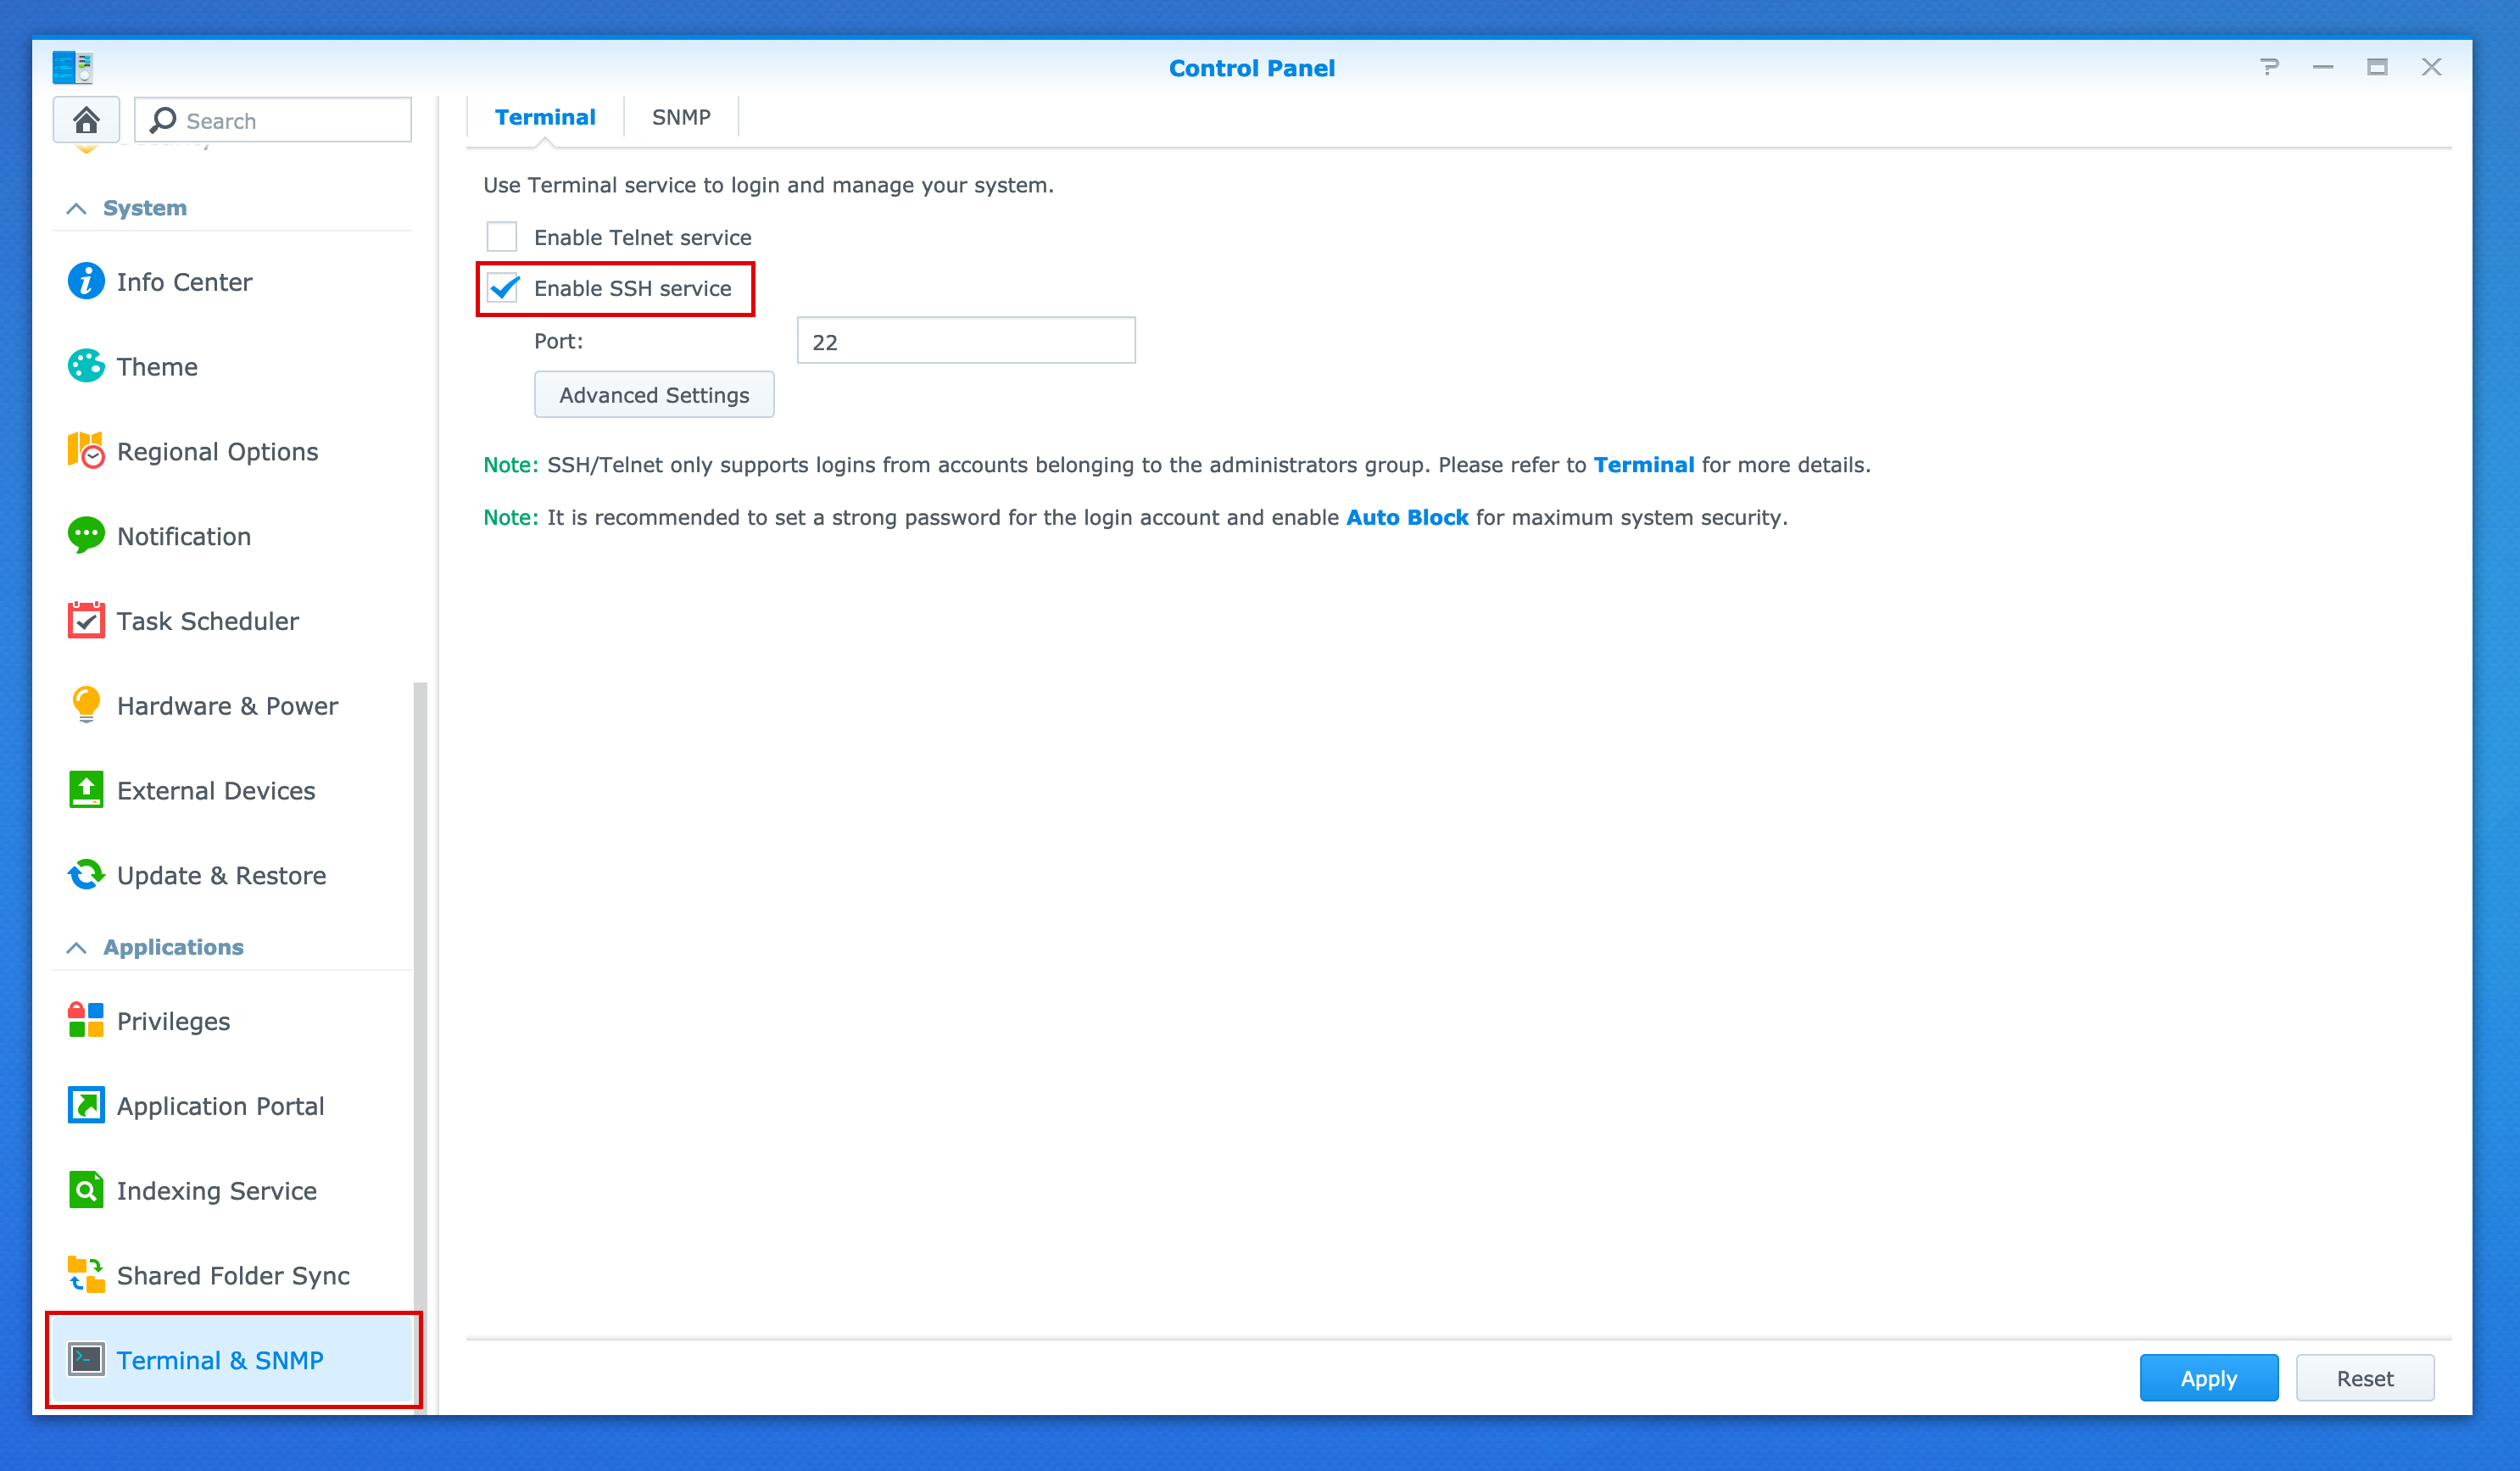
2. Enable SSH in DSM
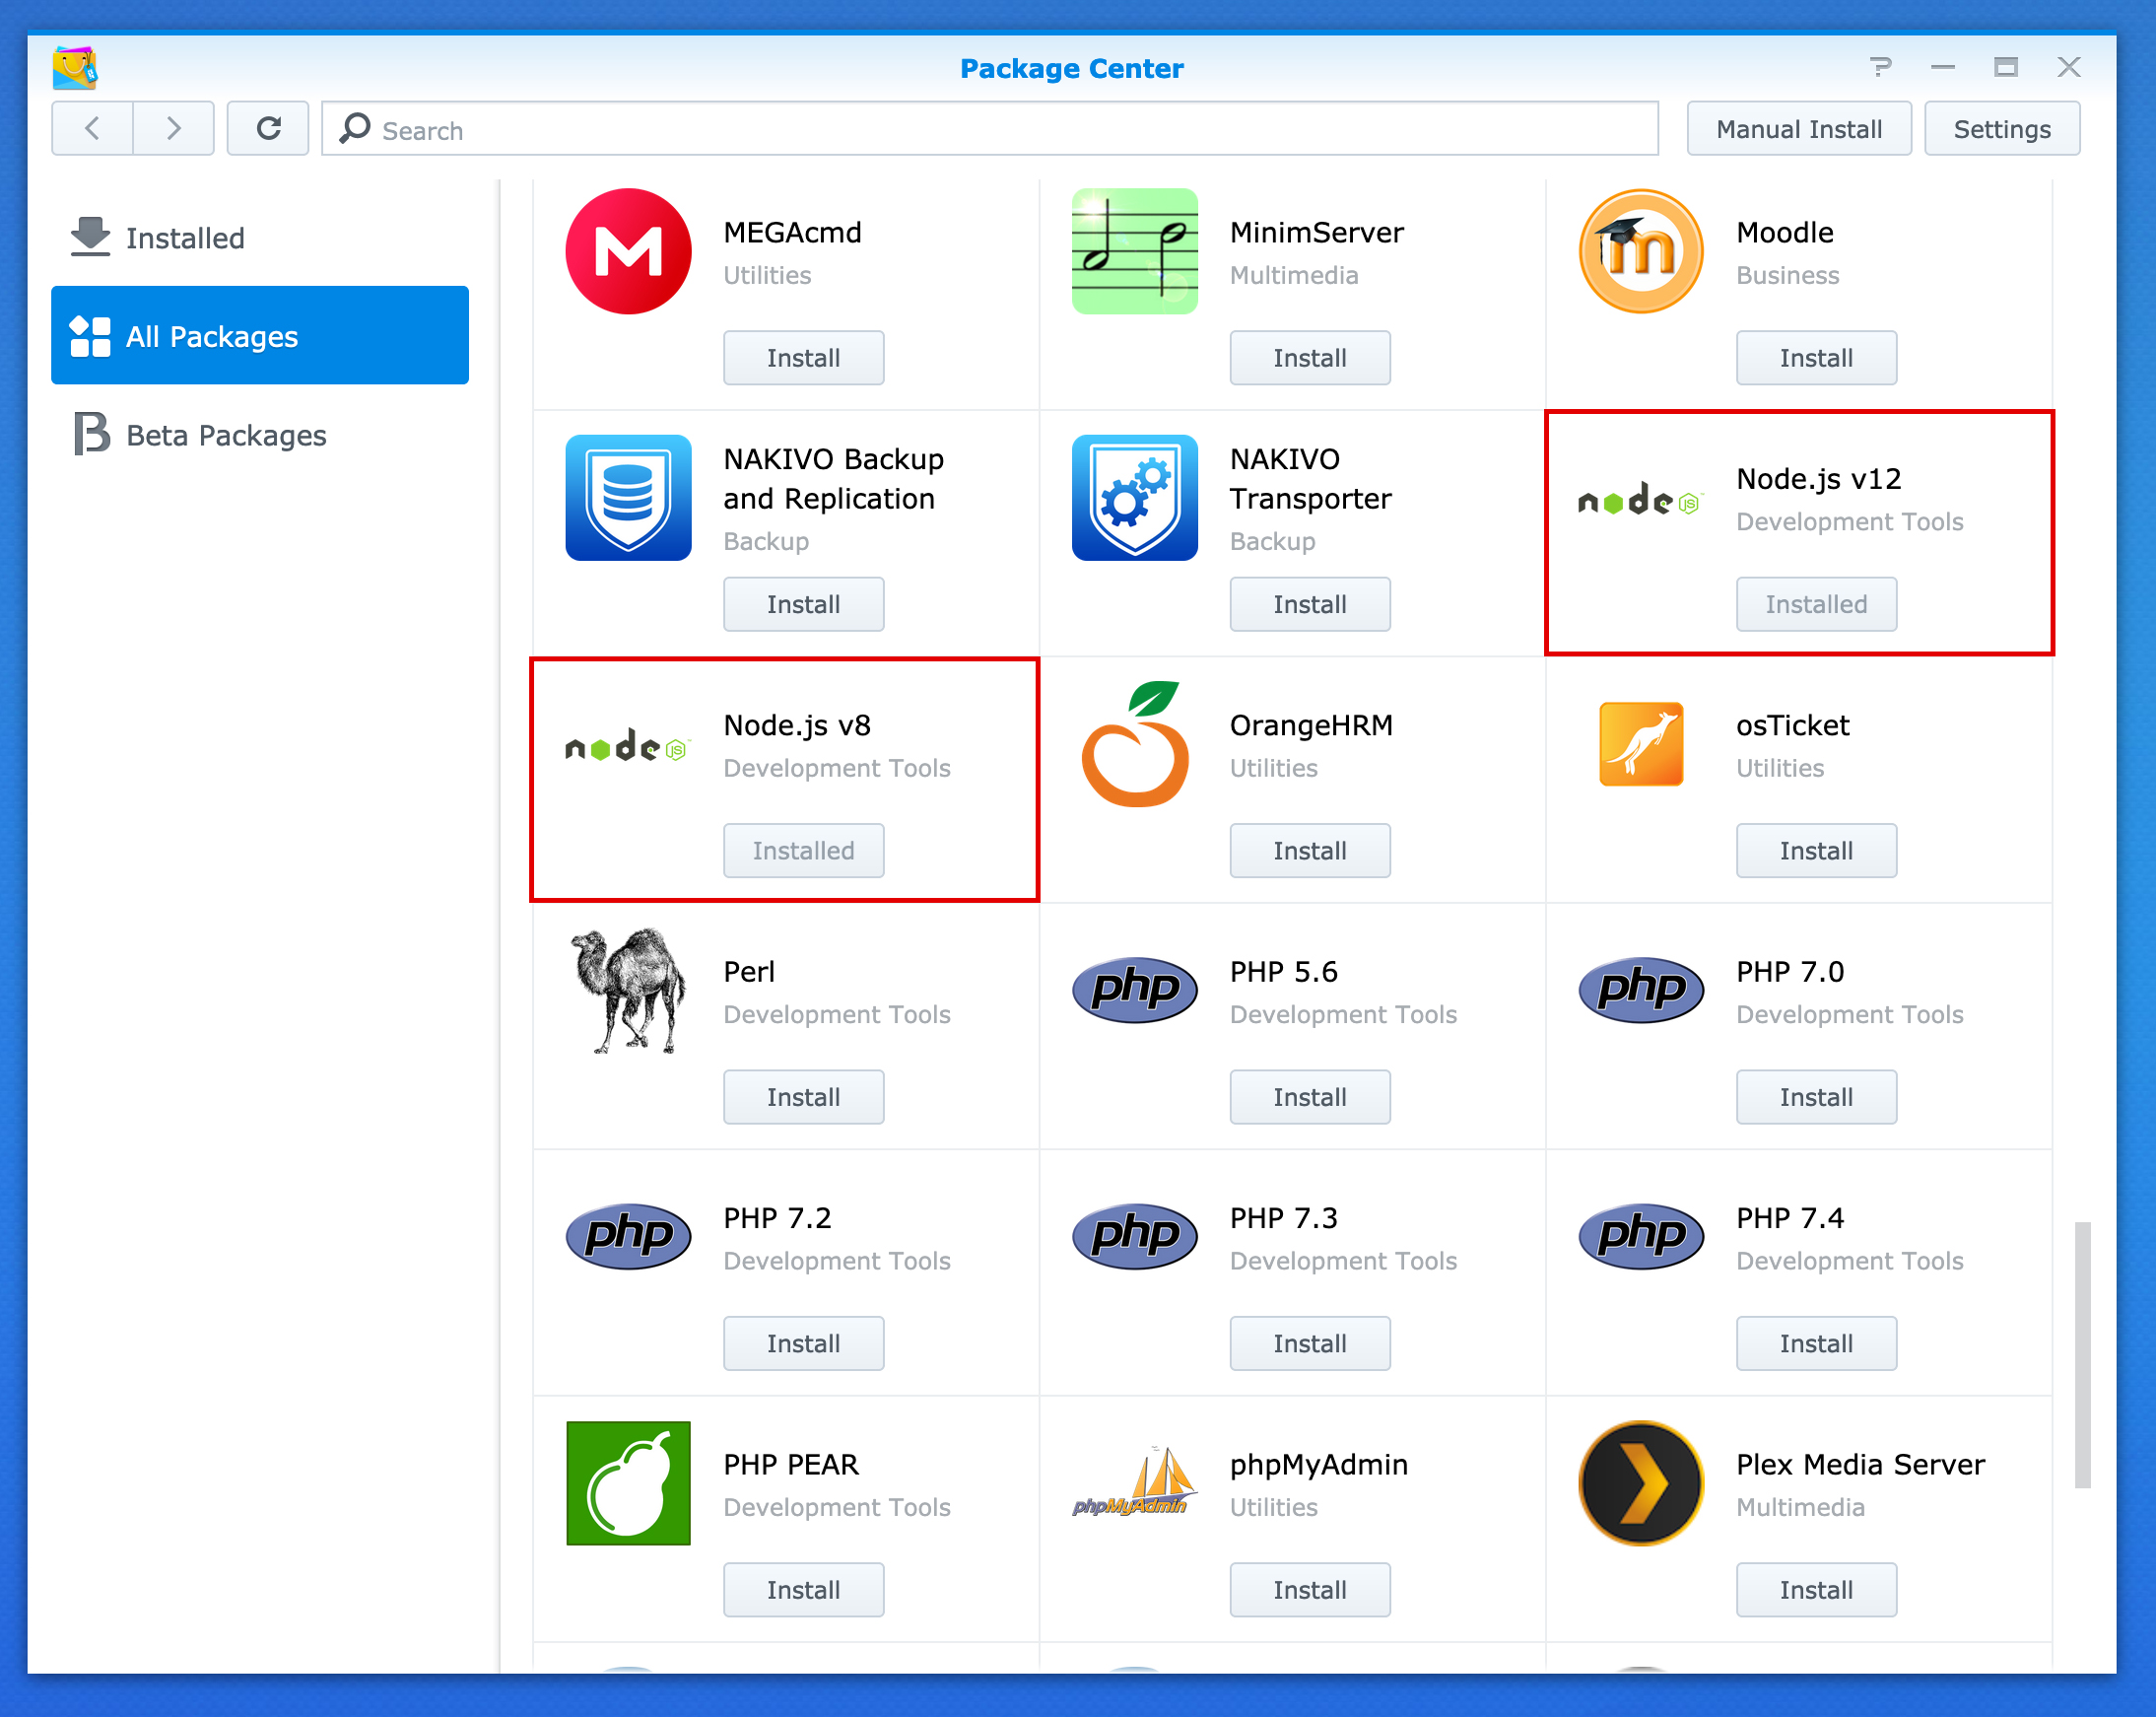
3. Install node.js to synology using DSM, I don't know if both are needed but I did it just in case and it seems to work just fine.
4. Create the foundry directories (the exact location of your directories is up to personal preference)
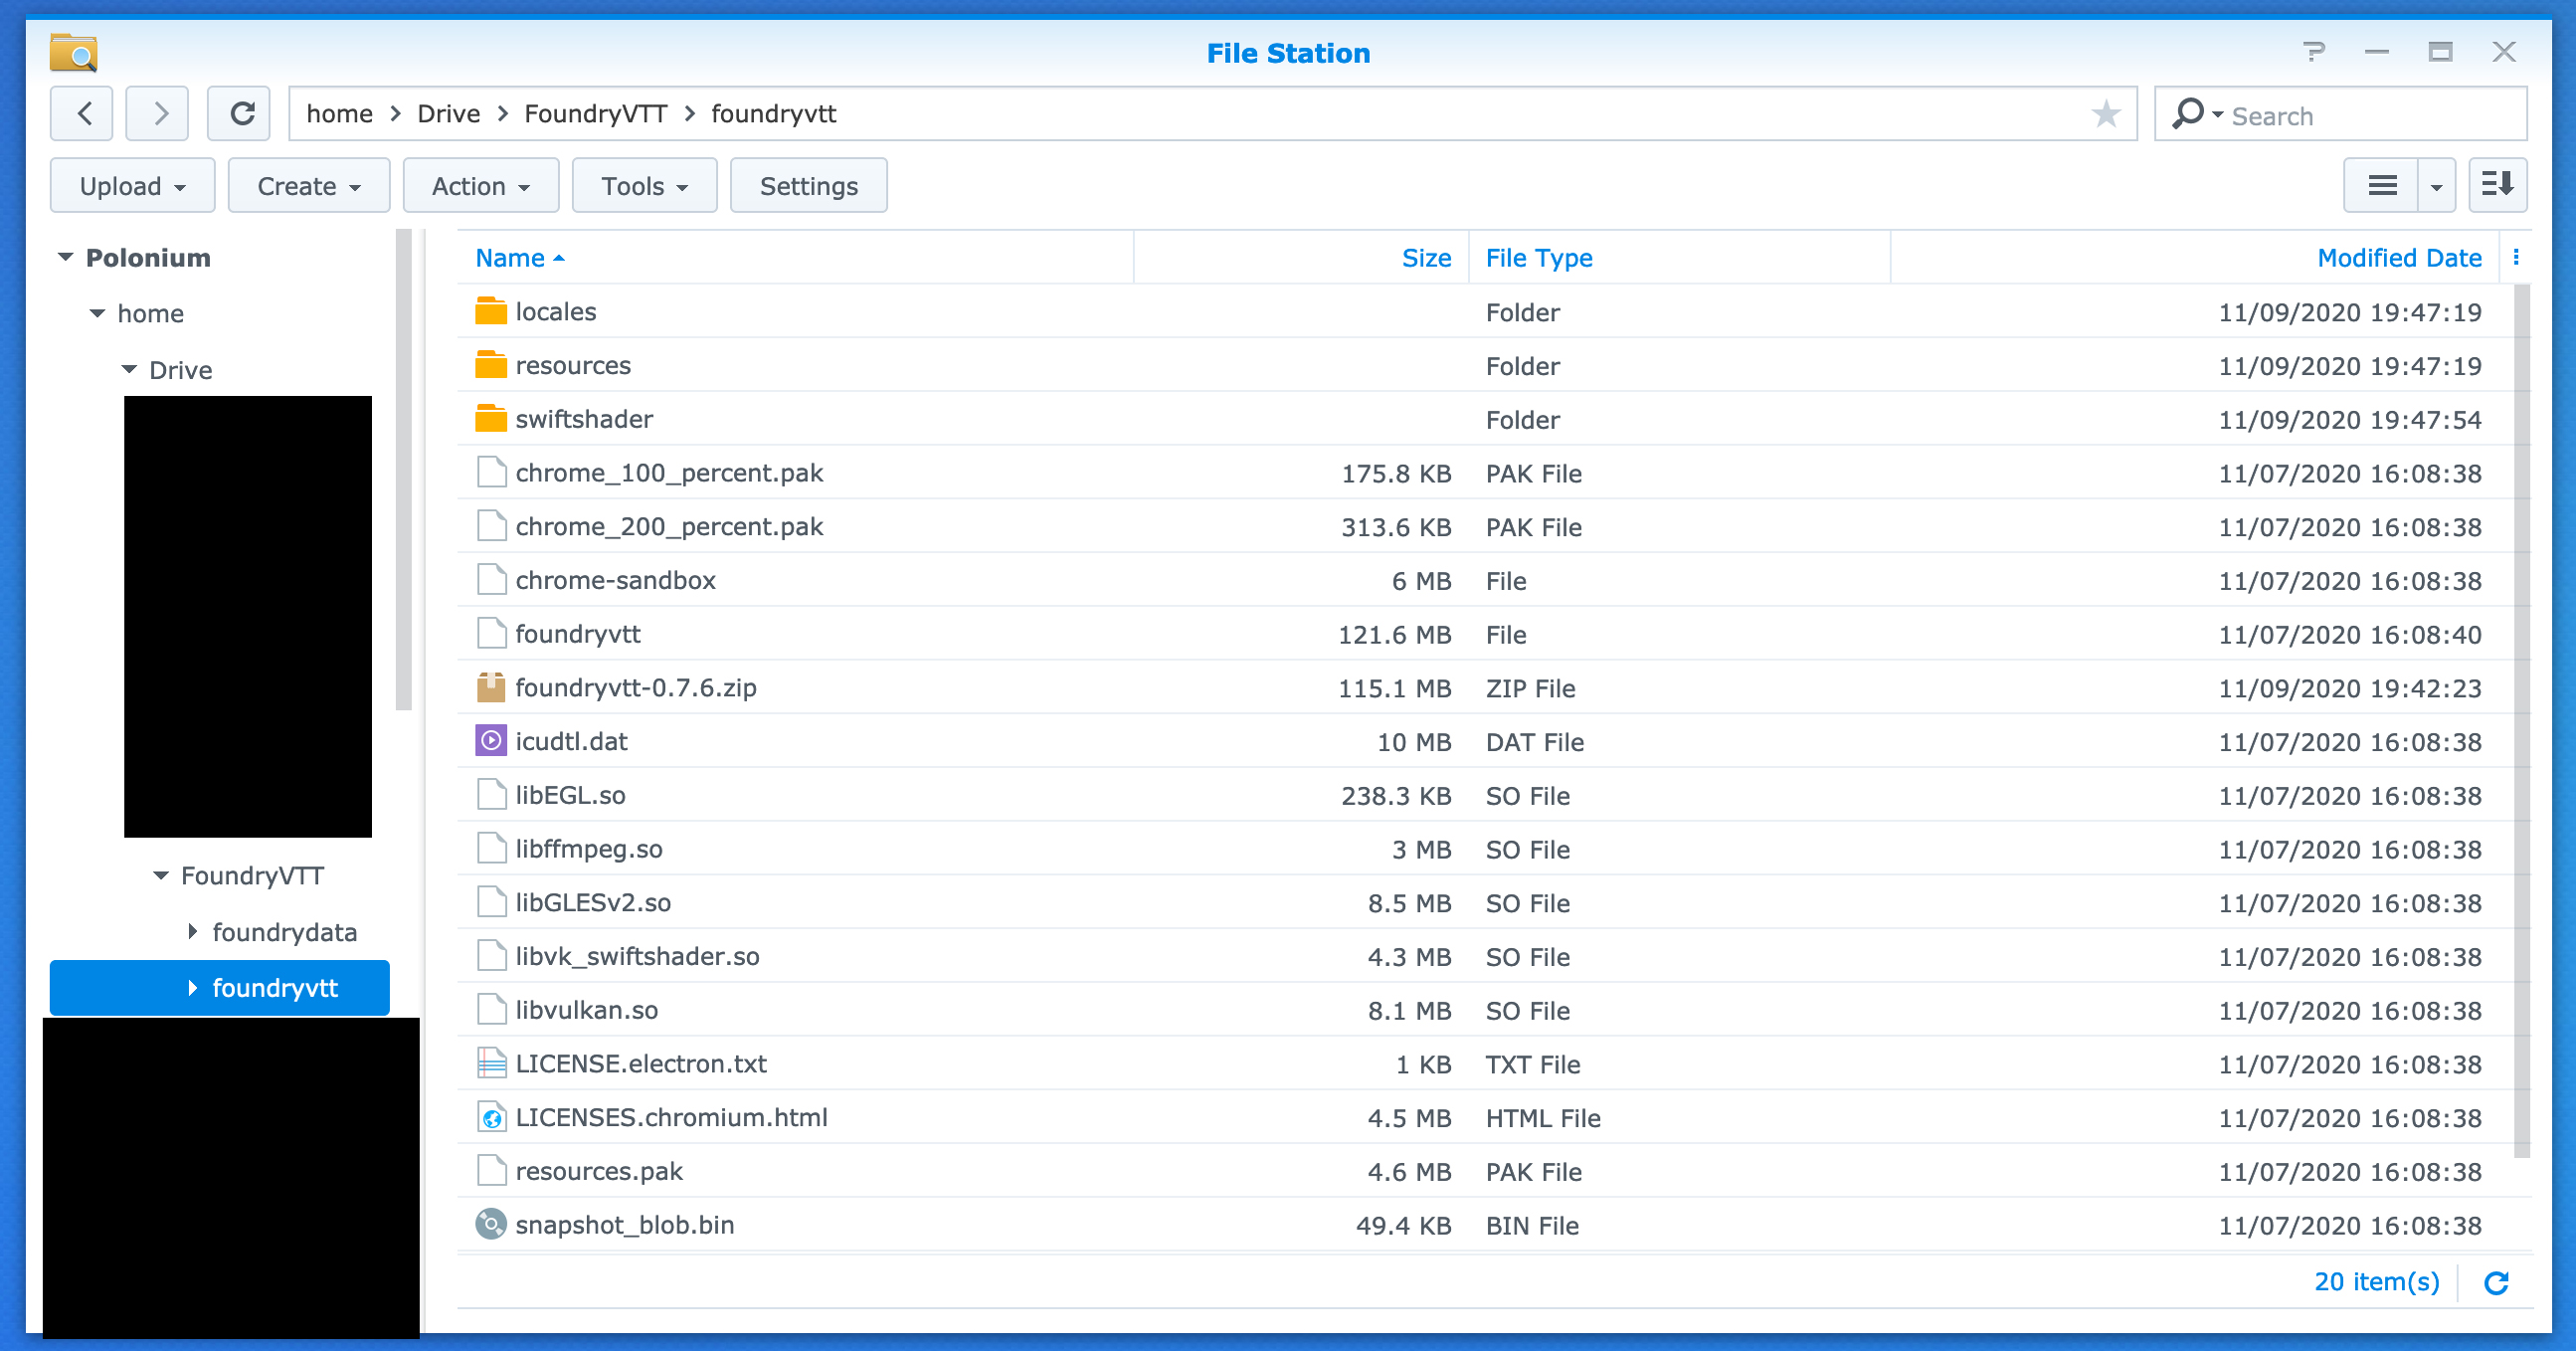
In this example I have created my directories in home/Drive/FoundryVTT/
The data folder will contain your modules, worlds, and configurations
The other folder contains the application files
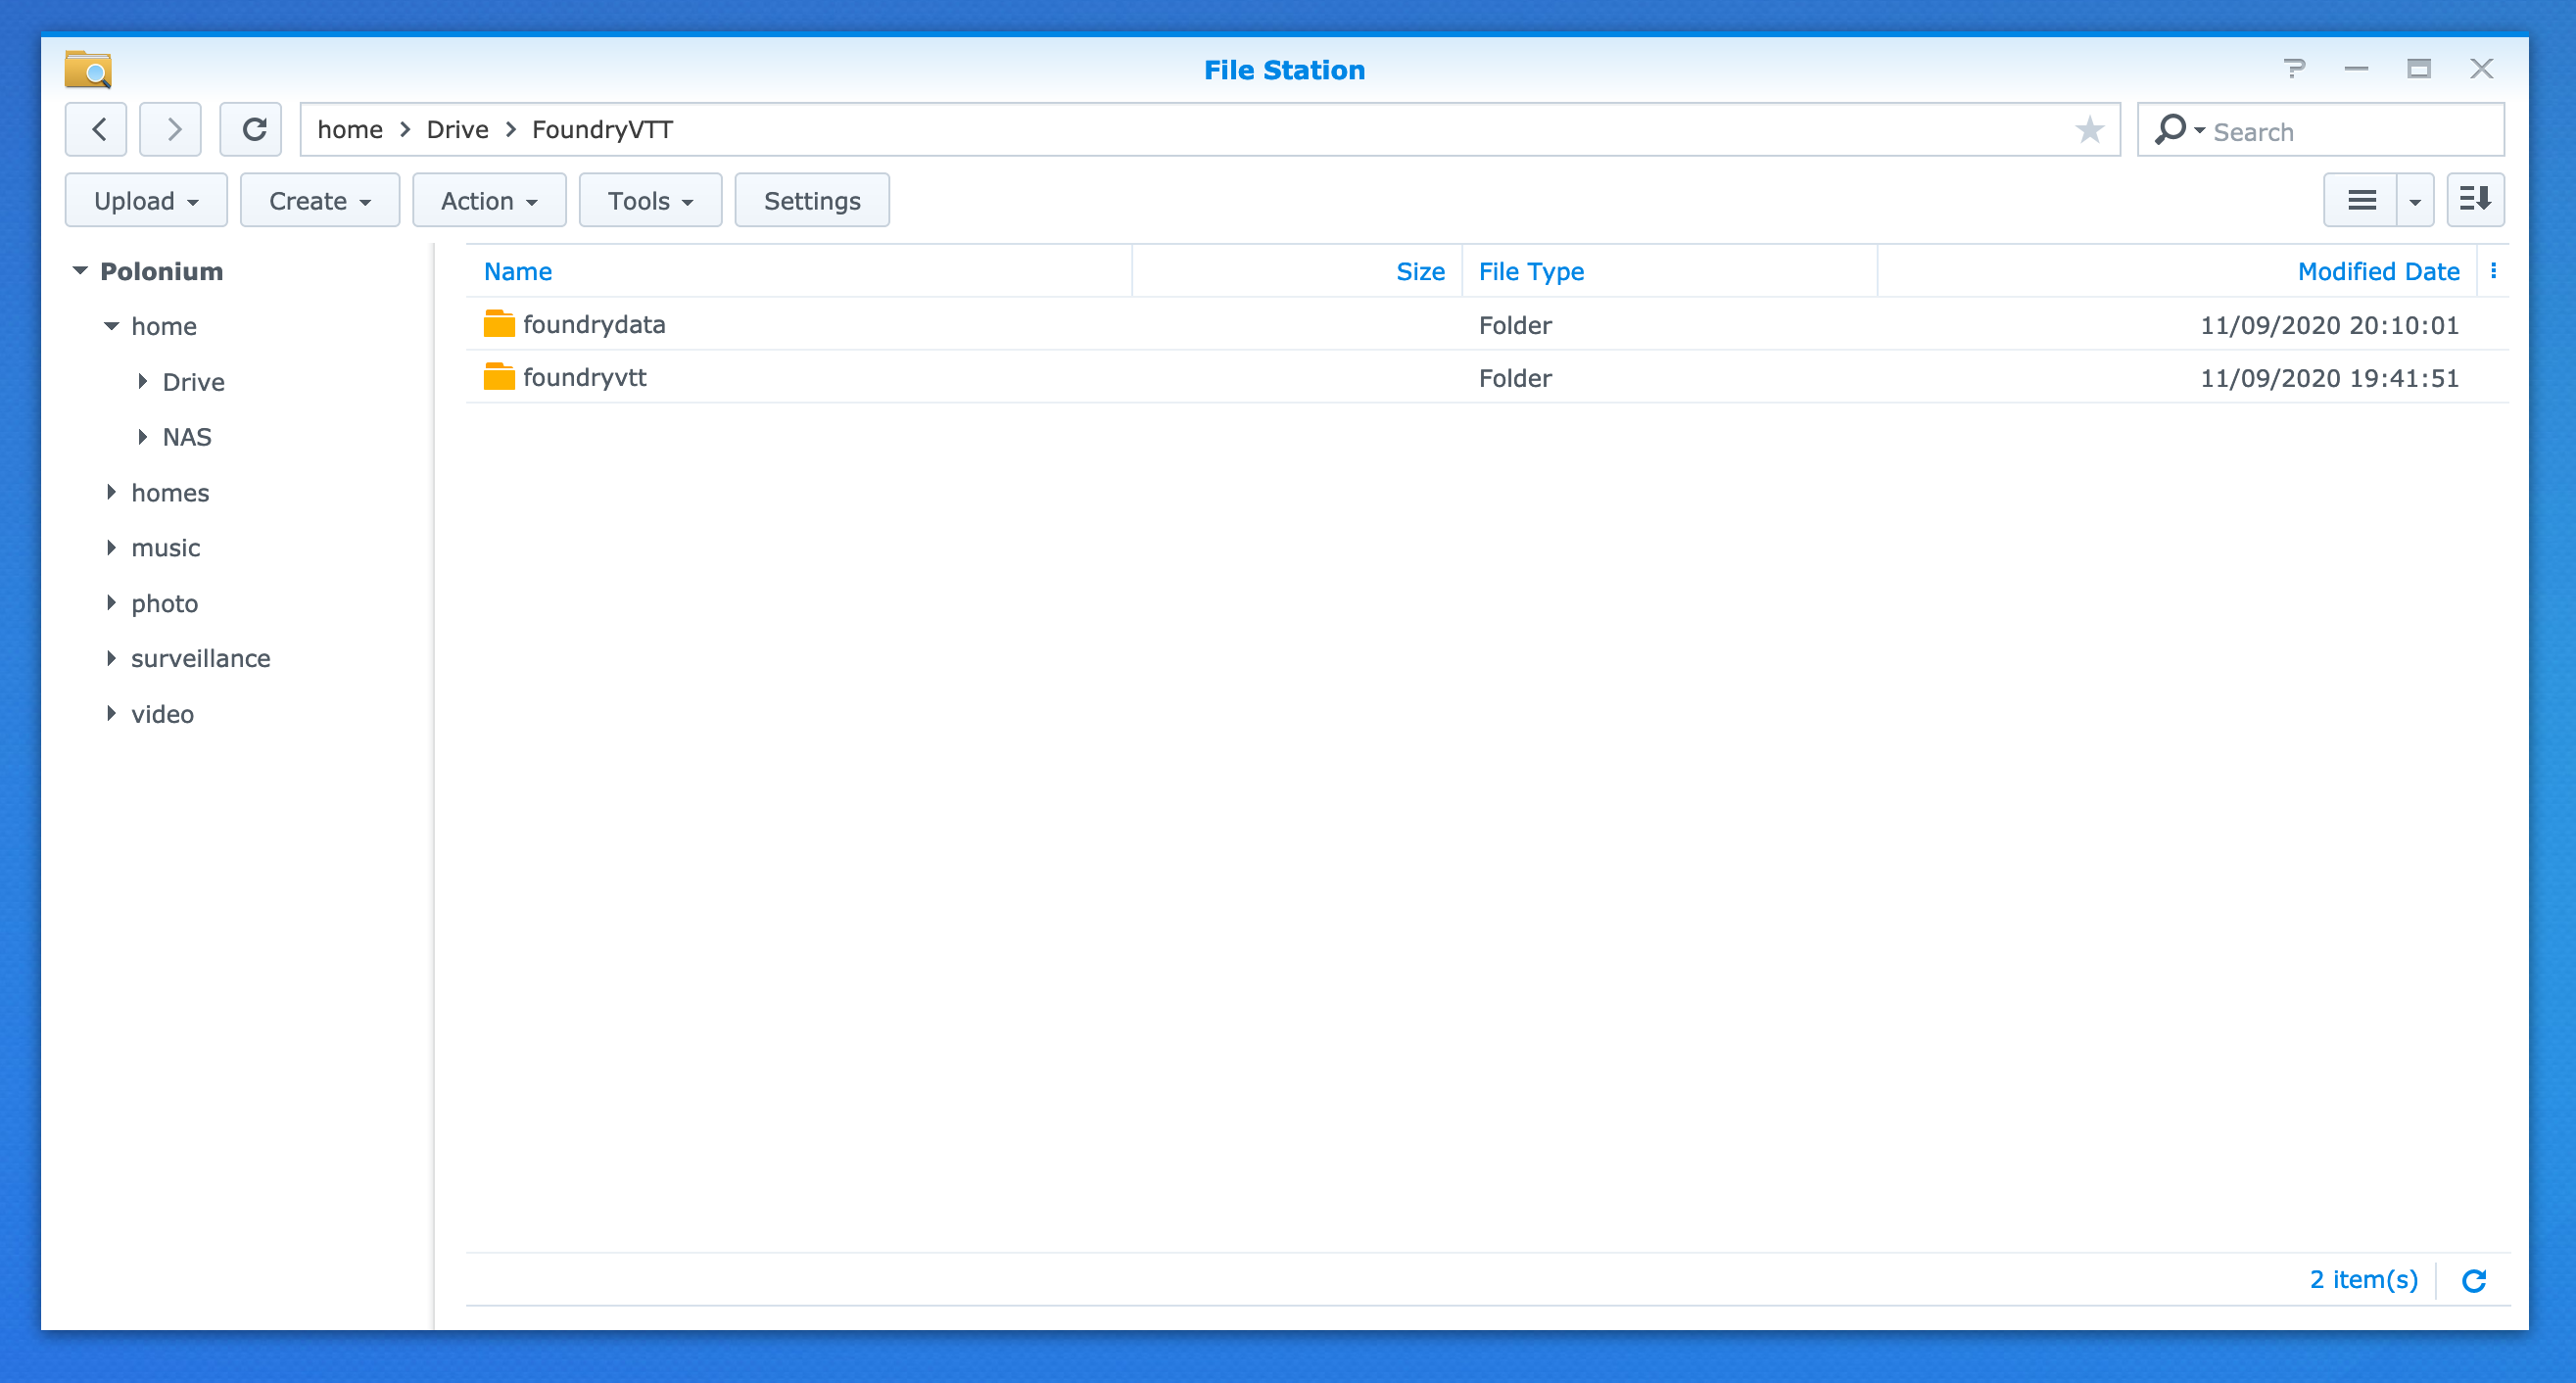
5. Download your node.js Foundry instance, this is located in your account page under purchased licenses. Download this file with DSM and extract the contents of the zip file into your foundryvtt (or whatever you chose) folder. It should look like below.
¶ Running a One-Time FoundryVTT instance
SSH into your synology NAS, this is using your SSH client of choice. I use MacOS and utilize the built in terminal option. Once you open your terminal/SSH client you'll connect to it:
'yourusername@yourcomputername ~ % ssh admin@<insert NAS IP>
Enter your password for the NAS and then enter the following:
sudo -i
You will now be in the root directory for your NAS, this next step changes depending on where you put your VTT, the volumes of your NAS and your file structure, these are the commands I use.
cd /volume1/homes/<hostname>/Drive/FoundryVTT
node foundryvtt/resources/app/main.js --dataPath=foundrydata
Once you close the SSH window this instance will stop working, it is a one time launch option.
¶ Running your FoundryVTT server continuously
If you would like to use your foundry VTT server AFTER closing the SSH client window then you'll need to use Forever. To install and operate forever on your system run the following commands:
npm install forever -g
You MIGHT need to do this with sudo, but if you have already gained root this shouldn't be required. Once forever has been installed you'll change the start-up command to the following, note you do not need to use the ‘node’ command for this to work:
forever start <directory to main.js> --dataPath=<directory to data path>
Finally to stop the foundry server you'd use the following:
forever stop <directory to main.js> --dataPath=<directory to data path>
¶ Notes
- Using this setup you will need to keep your SSH client open while the server runs, unless you use Forever to keep it running.
- If you close the SSH client without properly shutting down the foundry instance or utilizing Forever it will make you reboot your NAS before it will allow you to launch FoundryVTT again.
- To properly shutdown your foundry instance, ctrl-c (or similar hotkey in your client) shuts down the instance properly (note using Forever you need to use a different shutdown process).
- I am a novice at these processes so I am open to automation suggestions or similar! - Diabolicbutterfly
¶ Setting up with Docker (no command line)
This guide was made with DSM 6.2.4
¶ Install Docker on your NAS
In the Package Center, install “Docker”
¶ Prepare the felddy/foundryvtt-docker image
IMHO it is the simplest docker image for running Foundry VTT, yet quite configurable.
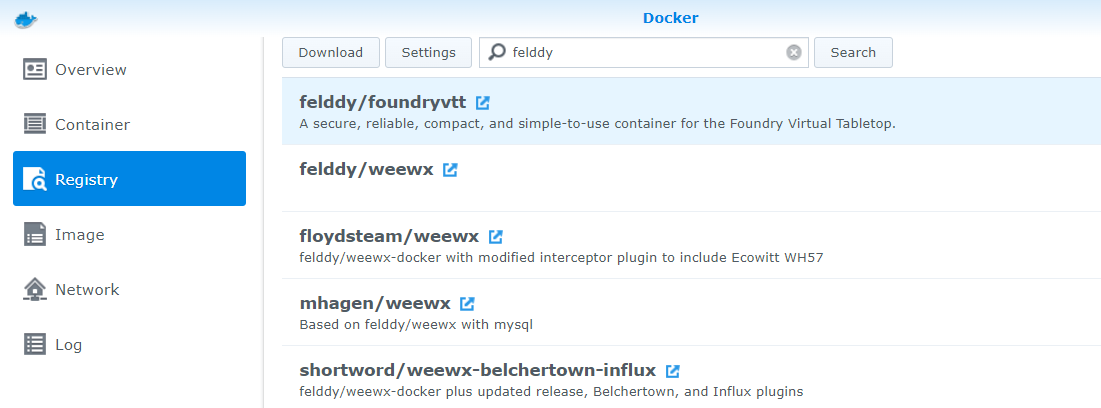
In Docker, go to Registry and search for “felddy”. Download the "felddy/foundryvtt-docker" image, when prompted choose the “release” tag.
Now, in the Image pane of Docker, Launch this image (this creates a “Container”, that is an instance of this image), you will be prompted for configuration, go directly to advanced settings:
- Enable auto-restart: checked
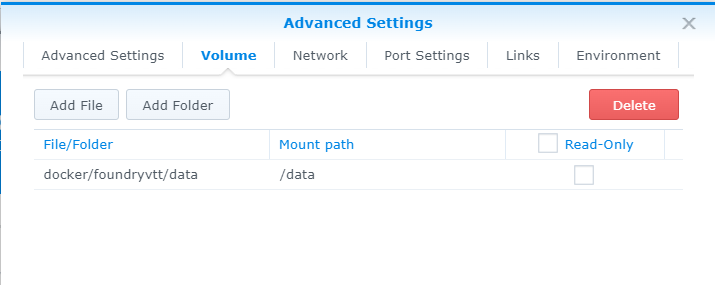
- Declare a folder for Foundry VTT to store its files. Volume → Add Folder:
- Choose a folder in your own NAS volumes for Foundry VTT data and config
- Type “/data” for the mounted path
- It is useful to access such files directly, otherwise they are embedded in the container
- Leave default port settings
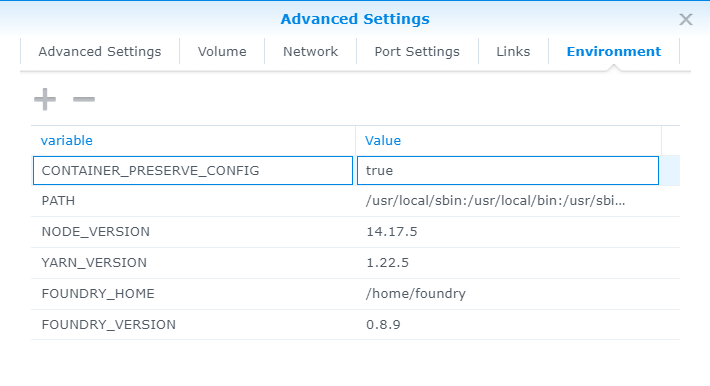
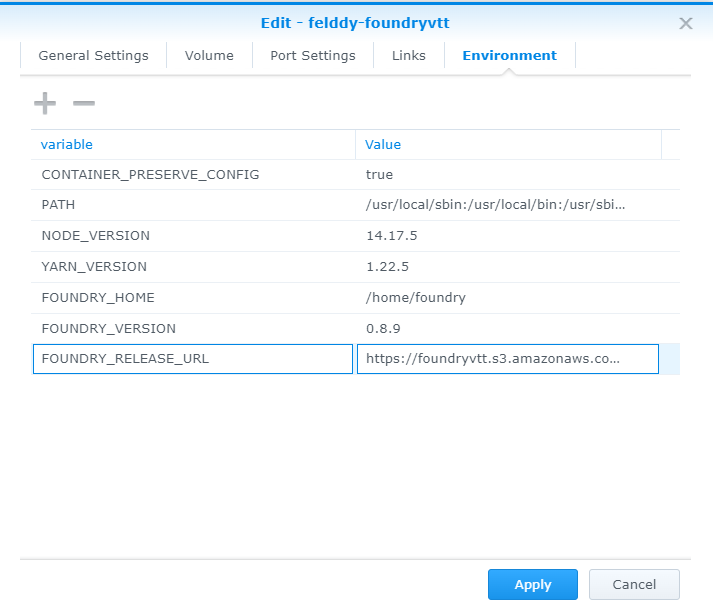
- In the Environment tab, add the CONTAINER_PRESERVE_CONFIG variable and set it to true
Apply these settings without running the container yet (uncheck “Run this container…”)
Now go the Container section in Docker and Edit the details of your container, go to the Environment tab, and add a FOUNDRY_RELEASE_URL variable, leave it empty for now.
¶ Get a temporary Foundry VTT Linux/NodeJS download URL
You need to be logged in https://foundryvtt.com/
Go to your account page, and click Purchased Licences button.
Make sure you select the Linux/NodeJS operating system selected and click the Timed URL button.
You now have 5 minutes to paste this link into the value of the FOUNDRY_RELEASE_URL variable of your container.
Apply your change and Start the container, you can use the toggle on the right for starting or stopping the container.

¶ Test that Foundry VTT runs locally in HTTP
Assuming your are on your local network with the NAS, use a web browser connect to your NAS on port 30000. Ex: http://mynasnameorip:30000/
Virtual VTT should run there.
If not you can go the Container Details, in the Log tab. This gives you the execution details on what's going on in the Container.
Remember that you can turn the web site on and off simply by turning the container on and off.
¶ Configurating HTTPS for your Foundry VTT web site
The goal here is to support the standard HTTPS port 443. You may already have a domain associated to your DSM on that port, that is why we need a dedicated domain for Foundry VTT.
For example, I'm already using a synology domain such as myquickconnectid.synology.me in order to connect to my NAS. It supports HTTPS (port 443). Since this domain is already used, I need another one for Foundry VTT. Make your to make it point to your NAS public IP. This kind of DNS configuration can take several hours or a couple of days.
¶ Configure the Reverse Proxy
In your NAS Control Panel, go to Application Portal → Reverse Proxy → Create.
Configure like the following, transposing:
- Your domain name
- Your NAS internal IP Adress
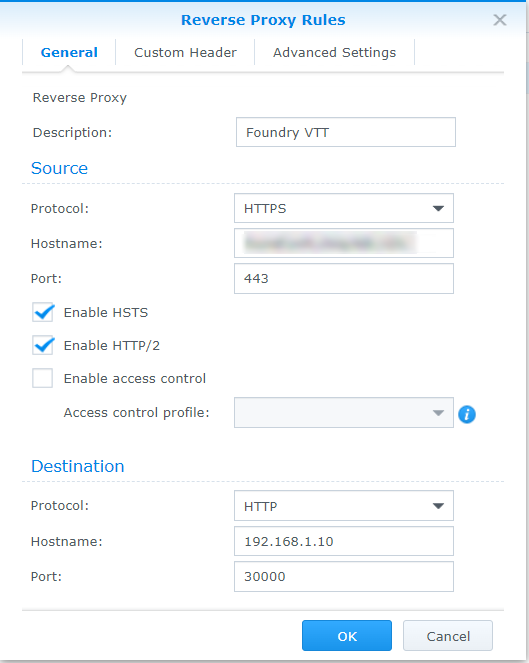
This will redirect the external trafic coming in HTTPS on your domain name to the internal HTTP web server on port 30000 in the Container.
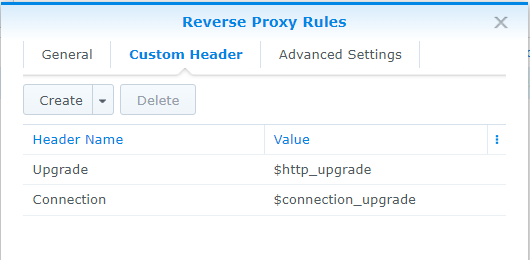
You must go to the Custom Header pane → Create → WebSocket
This will create the following declarations, and will make the WebSockets work (if not working, Foundry VTT user interface will not work).
¶ Get a Certificate for your domain name
In your NAS Control Panel, go to Security → Certificate → Add
Choose Add a new Certificate, then Get a Certificate from Let's Encrypt
Input your domain name, and your email adress.
The certificate will have to be renewed regularly, but this is well assisted by the Synology UI.
Finally, click on Configure, and associate your new certificate with your reverse proxy entry, so that it is used for your Foundry VTT incoming trafic.
¶ Do some VTT Foundry configuration
Open the Config/options.json in your Foundry VTT folder (remember the volume you mounted in the Docker container, or your Foundry data path)
Make sure you have following values set up:
 "port": 30000,
 "proxySSL": true,
"proxyPort": 443, Now you should be able to browse your VTT Foundry domain name, on your self hosted instance!
You may also use the Audio/Video integration which requires HTTPS.
¶ Updating Foundry VTT
TBD